Introduction
Many beginners enter the stock market with excitement, but they often feel confused when prices move up and down quickly. Looking at a raw price chart for the first time can feel like trying to read a foreign language under a high-pressure deadline. Green and red bars blink rapidly, financial news networks broadcast conflicting opinions, and social media platforms are filled with self-proclaimed gurus pointing to mysterious lines. Without a reliable compass, this flood of visual information quickly leads to analysis paralysis or, worse, impulsive execution driven entirely by greed and fear.
This is exactly where mathematical chart indicators serve a structural purpose. Instead of trying to guess where a stock might go based on a gut feeling, indicators process raw market data—such as historical prices and buying volumes—into clean visual layouts. They do not predict the future, nor do they eliminate the inherent financial dangers of trading. Instead, they act as filter systems that help separate meaningful structural trend developments from temporary, erratic price noise.
For an absolute beginner, developing an operational understanding of these tools is a critical protective shield against heavy financial errors. Relying on random stock tips or buying into a stock simply because its price is climbing fast are common habits that drain small trading accounts rapidly. A professional, disciplined framework values process stability over emotional guesswork. Whether you want to participate in short-term market swings or simply wish to time long-term portfolio entries more effectively, learning how indicators function ensures your decisions are anchored in objective statistical evidence rather than pure emotional panic. This comprehensive guide is built to transition you away from speculative guessing and toward data-guided structural market comprehension.
Understanding Trading Indicators in Simple Words
At its absolute core, a trading indicator is a mathematical calculation derived from a stock’s historical price action, volume, or open contract interest. Think of it like a vehicle’s dashboard metrics. Your speedometer does not map out the upcoming turns on the highway, but it gives you real-time data regarding your current velocity so you can make informed adjustments before entering a sharp curve.
Indicators take variables like the opening price, highest point, lowest point, and final closing price of a stock over a specific timeframe (such as 14 days or 50 hours) and convert those numbers into visible lines, bands, or histograms directly on your chart.
The Practical Real-World Connection
In regular life, we rely on rolling averages constantly without realizing it. For instance, if you want to understand the true summer temperature of a coastal city, you do not just check the hot temperature at 2:00 PM on a single Tuesday. Instead, you look at the average temperature over the past 30 days. This calculation irons out any single-day weather anomalies, giving you a clear picture of the actual seasonal climate pattern. Stock market indicators apply that exact logic to equity values.
- Common Misunderstanding: Many newcomers believe that a technical indicator is a predictive machine that flashes a green light whenever a stock is guaranteed to go up.
- The Reality: Indicators never lead the market; they follow the structural movement of capital. They are visual representations of historical math designed to confirm context, not guarantee future outcomes.
- Core Takeaway: Use these chart tools to measure what the market is doing right now, rather than trying to force a guess about what it might do next.
Why Tracking Technical Indicators Is Important
Operating in the financial markets without an analytical framework is the equivalent of driving an automobile through heavy fog without headlights. Technical indicators provide structure, consistency, and a repeatable baseline for checking conditions.
- Removing Emotional Bias: Human brains are wired to see patterns where they do not exist, especially when real money is on the line. When you have a strict rule that requires an indicator confirmation before entering a position, you override the dangerous urge to trade out of boredom or sudden greed.
- Evaluating Momentum Volatility: Prices do not move in a straight line; they move in waves. Indicators show you how much power is hidden behind a price surge. A stock rising on low volume with an exhausted momentum line warns you that the upward move lacks institutional backing.
- Risk Control and Planning: Successful trading is entirely a game of structural risk management. Indicators assist you in identifying objective structural pivot points on a chart where your trade logic is proven wrong. This allows you to set clear, mathematical exit thresholds (stop-loss orders) before you expose a single dollar to market fluctuations.
- Long-Term Capital Preservation: By understanding when an asset class is reaching historical extremes of over-expansion or deep exhaustion, you avoid buying at the absolute peak of a speculative bubble or panicking out at the absolute bottom of a temporary correction.
The Real Problem Readers Face With Market Charts
The central issue facing modern retail participants is not a lack of market information—it is an overwhelming excess of uncurated data.
[Raw Price Fluctuations] ---> [Information Overload] ---> [Emotional Mistakes]
                                       |
                     (The Solution: Clean Indicator Filters)
New traders quickly get caught up in “indicator overload,” adding ten different tools onto a single chart layout until the actual price bars are completely obscured. This creates a state of confusion where one indicator says “Buy” while another screams “Sell.”
Furthermore, the internet is flooded with highly unrealistic marketing advertisements promising simple, magical systems that yield effortless riches. New users often download complex charting software, encounter thousands of potential metrics, and default to following whatever trending asset is highlighted on their social media feeds. They treat technical analysis like a game of luck, failing to understand that different indicators serve distinct market conditions. Using a trend-following indicator inside a flat, sideways-moving market results in repetitive small losses that can quickly degrade an account balance. Recognizing this mismatch between chart tools and actual market contexts is the first major psychological milestone on your path to financial literacy.
How to Apply Technical Indicators Step by Step
To safely evaluate any technical indicator without experiencing system confusion, follow this standard structural analysis checklist for every tool you study.
Step 1: Identify the Tool’s Core Purpose
- What it means: Determine exactly what market variable the metric is designed to measure.
- Why it matters: You must know if the line on your screen represents structural trend direction, internal speed (momentum), market boundary width (volatility), or transaction liquidity (volume).
- How to apply it: Never mix up tool classes. If you need to check if a trend is active, look exclusively at a trend tool like a Moving Average, not an independent volume bar.
- Common Mistake: Using an overbought oscillator to identify an overall long-term trend direction.
- Better Approach: Keep different tool groups separated mentally and visually.
Step 2: Read the Raw Baseline Configuration
- What it means: Learn the standard mathematical lookback input settings (for example, a 14-period standard setting).
- Why it matters: Adjusting standard metrics randomly when starting out makes your analytical results erratic and impossible to measure reliably over time.
- How to apply it: Keep the factory default settings on your charting platform active until you have logged at least one hundred historical chart reviews.
- Common Mistake: Changing a daily metric setting from 14 to 5 just to force a trade signal to appear during a boring market phase.
- Better Approach: Accept flat periods calmly; let the indicator keep you safely out of unclear market environments.
Step 3: Analyze the Visual Chart Plotting
- What it means: Observe whether the visual data displays as an overlay line directly on top of the price candlesticks, or as an independent oscillator in a separate window below the main chart.
- Why it matters: Overlays help you see structural support boundaries, while sub-window indicators show internal rate-of-change dynamics without cluttering price views.
- How to apply it: Dedicate the top section of your screen to raw price behavior and structural support lines, while keeping your momentum oscillators focused neatly underneath.
- Common Mistake: Piling multiple tracking lines on top of the main candlestick panel until price bars become unreadable.
- Better Approach: Limit your template design to one main overlay tool and one or two sub-window indicators max.
Step 4: Check for Signal Convergence
- What it means: Look for situations where two completely independent structural indicator categories point toward the exact same conclusion.
- Why it matters: A single metric signal can easily be an anomaly caused by random daily volatility. When multiple tool categories align, the visual setup carries higher structural validity.
- How to apply it: If a stock crosses above a critical daily Moving Average, verify if the underlying transactional Volume bar also prints higher than its previous 20-day average.
- Common Mistake: Executing a position based purely on a single isolated line crossover without cross-checking structural liquidity.
- Better Approach: Require a minimum of two structural confirmations from distinct metric categories before validating a setup.
Step 5: Define the Structural Point of Invalidation
- What it means: Pinpoint the exact visual mark where the metric signals that your trade logic is no longer correct.
- Why it matters: Protecting capital is your absolute number one priority. You must know your financial exit plan before you initiate an open market commitment.
- How to apply it: If you buy a position because an indicator shows strong support, establish an automatic trailing stop order just beneath that technical support floor.
- Common Mistake: Staying stuck in a deteriorating position while hoping the indicator magically reverses direction in your favor.
- Better Approach: Treat the indicator’s invalidation mark as an absolute command to exit the trade without hesitation.
Key Factors That Influence Chart Indicators
To keep your technical evaluations grounded in reality, you must understand the underlying structural variables that dictate indicator performance.
- Macro Market Volatility: Indicators behave differently depending on wide-scale market environments. In highly volatile or news-driven conditions, standard mathematical formulas can produce rapid, erratic signals (whipsaws) as price bands widen drastically.
- Timeframe Selection: A single asset chart can show completely opposite signals depending on your selected lookback interval. A stock might look strongly bullish on a 5-minute chart while showing a dominant, heavy structural downtrend on a weekly chart. Beginners should start with higher-level frames (like Daily or 4-Hour charts) because they contain less deceptive market noise.
- Underlying Asset Liquidity: Technical analysis relies on the natural supply and demand mechanics of large crowds. In low-volume penny stocks or thinly traded micro-cap assets, major individual orders can easily distort price lines, rendering standard indicators highly unreliable.
- Systemic Economic Releases: Scheduled corporate earnings reports, central bank interest rate choices, and major macroeconomic employment numbers alter raw capital flows instantly. Mathematical charts cannot factor in these incoming news events; therefore, technical setups can break down completely during key news releases.
Detailed Breakdown of Primary Trading Indicators
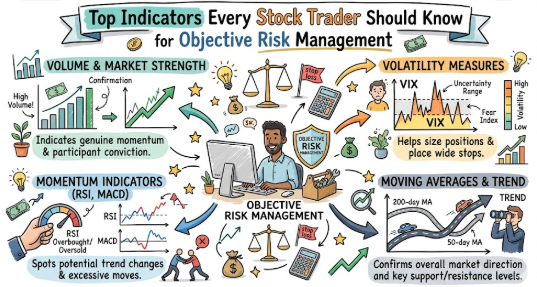
To build a functional understanding of technical chart analysis, let’s explore the primary indicator classifications: Trend, Momentum, Volatility, and Volume.
Trend Indicators (Lagging)
Trend indicators track historical price direction. They are classified as “lagging” because they require price data to move first before the calculation can adjust. Their value lies in filtering out short-term market noise to reveal the underlying direction of capital flow.
1. Simple Moving Average (SMA)
The Simple Moving Average takes the closing prices of a stock over a specific number of days, adds them together, and divides the total by that lookback period. This creates a smooth line that tracks the historical price trend.
- Standard Formula Basis:$$\text{SMA} = \frac{P_1 + P_2 + \dots + P_n}{n}$$(Where $P$ is the closing price and $n$ is the total number of periods)
- How to Use: The 50-day and 200-day SMAs are widely watched by major institutional funds. When a stock’s price trades cleanly above its 200-day SMA line, the market is structurally in an overall long-term uptrend.
- Common Mistake: Buying a stock the exact second it drops below a long-term SMA line while assuming it is automatically “cheap,” ignoring the reality that a structural downtrend may be starting.
2. Exponential Moving Average (EMA)
The EMA is a variation of the moving average that applies more mathematical weight to the most recent daily price points. This makes it significantly more responsive to new information than a standard SMA.
- How to Use: Short-term market participants frequently utilize the 9-period and 21-period EMAs to track quick momentum shifts. If a fast-moving EMA crosses above a slower-moving EMA from below, it indicates that short-term price momentum is accelerating upward.
Momentum Indicators (Leading / Oscillators)
Momentum tools evaluate the internal speed and rate-of-change of price movements. They typically operate in a separate sub-window beneath the main chart, oscillating between fixed boundaries (like 0 and 100) to show when a move is stretching toward historical extremes.
3. Relative Strength Index (RSI)
The RSI measures the internal velocity and magnitude of recent price shifts. It scales this momentum on a visual plane ranging from 0 to 100.
- Key Levels: A reading above 70 indicates that an asset is historically overextended to the upside (overbought). A reading stretching down below 30 implies the asset is significantly extended to the downside (oversold).
- How to Use: Look for momentum exhaustion. If a stock rallies to a new high price but the RSI prints a lower peak than its previous rally, it reveals a hidden loss of upward power. This layout is known as a bearish divergence.
Price Chart:    [Old Peak]  ----->  [New Higher Peak]  (Looks Bullish)

RSI Oscillator: [Old High]  ----->  [New Lower Peak]   (Shows Exhaustion!)
4. Moving Average Convergence Divergence (MACD)
The MACD turns trend-following moving averages into a dynamic momentum oscillator. It calculates the structural distance between a 12-period EMA and a 26-period EMA.
- Visual Breakdown: It displays a fast MACD line, a 9-period Signal line, and a central Histogram that oscillates above and below a baseline zero mark.
- How to Use: When the fast MACD line crosses above the Signal line from underneath while positioned below the zero baseline, it indicates a potential positive turn in momentum.
Volatility Indicators (Overlays)
Volatility tools map out the structural width of price fluctuations, helping traders visualize how far a stock is stretching relative to its typical trading boundaries.
5. Bollinger Bands
Designed by John Bollinger, this tool features a central 20-period simple moving average flanked by two boundary lines plotted standard deviations away from that central anchor.
- The Squeeze Effect: When market conditions turn quiet, the upper and lower bands contract tightly together (a squeeze). This visual contraction warns that the market is storing energy, frequently serving as a precursor to an upcoming high-volatility breakout.
- How to Use: Treat the outer bands as flexible elasticity lines. If price forces its way completely outside the upper band without institutional volume confirmation, it often indicates an overextended move prone to snapback reversion.
Volume Indicators (Liquidity Confirmations)
Volume tracking measures the absolute quantity of shares changing hands during a specific period. It provides critical insight into whether a price move is driven by large institutions or retail speculation.
6. Volume Bars
Simple color-coded columns printed at the base of your chart layout. A green bar means the stock closed higher for that period, while a red bar signifies a lower close.
- How to Use: Always use volume to validate breakouts. If a stock breaks above a clear horizontal resistance barrier on volume that is two to three times higher than its daily average, it demonstrates that large institutions are actively committing capital to that upward move.
Common Mistakes Beginners Make With Technical Indicators
It is incredibly easy to misuse technical chart indicators when you are starting out. Recognizing these classic behavioral traps early can save you from unnecessary frustration and heavy drawdowns.
- Treating Indicators Like a Crystal Ball: The absolute most destructive habit is assuming that an indicator reading makes an upcoming market move certain. Indicators simply summarize past data. Unexpected global events or sudden institutional selling can break any textbook chart setup instantly.
- Collecting Redundant Tools: New traders often place RSI, Stochastics, and Williams %R on their charts simultaneously. Because all three are momentum oscillators based on similar rate-of-change formulas, they will flash the exact same signal at the exact same time. This creates a dangerous illusion of confirmation when you are actually just looking at the same data repackaged three different ways.
- Ignoring the Global Trend Context: Buying an asset simply because an oscillator drops below 30 on a short-term chart is incredibly risky during a major macro market decline. In a severe structural downtrend, an asset can easily stay deeply “oversold” for weeks at a time while the underlying equity price drops 30-40% lower.
- Failing to Establish an Invalidation In Advance: Entering an open market trade based on an indicator signal without setting an automated stop-loss order invites major emotional stress. If the position goes against you, the tendency is to move your exit point lower and lower while hoping things turn around. This turning of a short-term trade into a long-term losing investment is a classic portfolio killer.
The “Don’t Do This” Checklist
- Don’t ever trade without a predefined structural exit plan.
- Don’t pack more than three technical indicators onto your active screen layout.
- Don’t attempt to trade highly volatile stocks during major macroeconomic data releases.
- Don’t buy a stock solely because a social media profile highlighted a chart crossover.
- Don’t change indicator parameters simply to justify an entry you want to take.
- Don’t use your vital daily emergency savings capital for active trading activities.
Practical Real-Life Examples of Indicator Applications
Example 1: The Long-Term Salaried Accumulator
- Situation: A salaried employee wants to build a long-term position in a high-quality blue-chip stock by allocating a small portion of their salary every month.
- Mistake: They log into their account on a random afternoon and buy shares when the stock is trading at an all-time high, driven by heavy media excitement.
- Better Action: They pull up a daily chart and wait for the price to drop back down toward its historical 200-day Simple Moving Average while checking that the daily RSI drops below 40.
- Learning: Patiently waiting for structural value zones ensures you accumulate long-term shares during minor market pullbacks rather than chasing short-term peaks.
Example 2: The Intraday Breakout Tracker
- Situation: A part-time trader spots an equity that has been consolidating sideways inside a tight horizontal price range for over three weeks.
- Mistake: The price ticks up past the top boundary by a few cents, and the trader jumps into a large position instantly out of heavy fear of missing out (FOMO).
- Better Action: The trader checks the underlying volume bar and waits for the daily candlestick to close cleanly above the resistance line on volume that tracks significantly higher than the 20-day average.
- Learning: Waiting for volume confirmation helps filter out temporary false breakouts that trap impatient retail capital.
Example 3: The Mid-Term Swing Position
- Situation: A participant wants to capture a multi-week swing move in a steady mid-cap technology asset.
- Mistake: They see the asset’s price drop for three consecutive days and buy shares heavily, assuming it must bounce soon.
- Better Action: They wait until the 9-period Exponential Moving Average crosses back above the 21-period EMA on a daily chart, signaling a structural return of short-term upward momentum.
- Learning: Entering a trade after momentum shows a confirmed turn preserves capital far better than trying to catch a falling price.
Example 4: The Volatility Range Strategist
- Situation: An options-focused participant looks to trade an asset that is currently moving sideways without a clear macro trend.
- Mistake: They buy long-term directional calls at the top edge of the sideways channel, assuming a major trend breakout is imminent.
- Better Action: They observe that the Bollinger Bands are completely flat and wide. They wait for price to touch the lower band while the RSI hits 30, planning a quick trade back up to the middle line.
- Learning: Matching your operational tools to the existing market environment prevents painful losses inside range-bound assets.
Example 5: The Systemic Momentum Reversion Trader
- Situation: A trader monitors a high-flying stock that has experienced an explosive multi-week rally driven by extreme online social media hype.
- Mistake: They buy more shares near the top because the daily price bars look massive and green, believing the momentum will never slow down.
- Better Action: They check the sub-window and notice a severe bearish divergence on the MACD histogram alongside an RSI reading pushing past 85. They sit out safely.
- Learning: Extreme indicator readings warn you when an ongoing trend is stretching to an unsustainable velocity, protecting you from buying at the absolute peak of a bubble.
Essential Reference and Comparison Tables
Table 1: Technical Indicator Categories and Core Functions
| Indicator Class | Primary Representative Tools | Best Market Condition | Core Informational Benefit |
| Trend Following | Simple Moving Average (SMA), Exponential Moving Average (EMA) | Strongly Trending Markets | Filters out short-term price noise; defines the structural path of least resistance. |
| Momentum Oscillators | Relative Strength Index (RSI), Moving Average Convergence Divergence (MACD) | Ranging or Overextended Markets | Measures the velocity of price changes; highlights hidden exhaustion levels. |
| Volatility Measures | Bollinger Bands, Average True Range (ATR) | Consolidating or High-Risk Phases | Visualizes the physical boundaries of price expansion; flags upcoming volatility breakouts. |
| Volume Tracking | Volume Bars, On-Balance Volume (OBV) | Breakout Confirmation | Confirms structural liquidity; shows if large institutional funds are backing a move. |
Table 2: Indicator Signal Mismatches and Adjustments
| The Common Mistake | The Real Risk Involved | The Better Analytical Approach |
| Buying a stock purely because its RSI drops below 30 in a heavy structural downtrend. | The asset can remain oversold for an extended period while the equity value falls significantly lower. | Wait for a trend tool (like an EMA crossover) to confirm an upward turn before acting on the oscillator’s warning. |
| Shorting a stock solely because it touches the upper Bollinger Band during an explosive institutional breakout. | Price can easily “walk the band” upward for weeks, causing severe losses to a short position. | Look for a clear volume drop-off and a bearish candlestick pattern before assuming the boundary will hold. |
| Placing five different momentum oscillators on a single chart template layout. | Redundant signals create a false sense of security while cluttering your visual field. | Clean up your screen; use exactly one trend tool, one momentum tool, and one volume indicator. |
Tools, Methods, and Frameworks Readers Can Use
Building a structured routine around your chart analysis is key to long-term consistency. Here are the core tracking methods you should integrate into your daily or weekly trading workflow:
[Maintain a Trading Journal] ---> [Run Post-Trade Reviews] ---> [Refine Entry/Exit Setups]
- The Two-Indicator Template Framework: Dedicate your chart layout to a clean, non-redundant system. Use one primary overlay trend tracker (like the 50-day EMA) to establish the macro direction, and one sub-window momentum oscillator (like the standard 14-period RSI) to measure short-term rate-of-change. If the two tools point in different directions, classify the setup as neutral and wait patiently on the sidelines.
- The Historical Trade Journaling System: Maintain a detailed written log or digital spreadsheet of every single market entry you make. For every position, record the exact date, the entry price, your stop-loss exit level, and the specific indicator readings that generated the entry signal. Review this journal monthly to identify which indicator setups yield the highest consistency within your preferred asset classes.
- The Static Breakout Verification Checklist: Before executing any breakout setup, require that three criteria are met: the price closes cleanly outside a historical horizontal resistance boundary, the execution period volume prints higher than the 20-period moving average of volume, and the momentum oscillator is not already trading deep inside overbought territory. If any check fails, step back and classify the move as a high-risk trap.
Expert Tips to Make Better Trading Decisions
- Prioritize the Price Action First: Never forget that indicators are merely secondary mathematical abstractions of price. If a stock’s price is printing a clear series of lower highs and lower lows, it is in a downtrend. Do not let an indicator reading trick you into buying against that primary structural reality.
- Let the Big Timeframes Guide Your View: Always check the daily or weekly chart layout before executing a trade on a shorter lookback frame. Trading a short-term bullish crossover on a 15-minute chart is incredibly dangerous if the weekly chart reveals the asset is bouncing directly into a heavy overhead institutional resistance wall.
- Embrace Flat Inactivity Patiently: When your technical indicators display a tangled, sideways pattern without a clear direction, treat it as a clear signal to do nothing. Preserving your cash balance during choppy, trendless market phases is a vital skill that separates professional market participants from speculative amateurs.
- Never Adjust Parameters to Fit a Bias: If a standard 14-period RSI does not give you a buy signal, do not change the lookback period to 7 just to force the indicator line down into the oversold zone. This behavioral trap is an expression of market greed and completely destroys your analytical consistency.
- View Volume as Institutional Footprints: Retail participants do not have the financial power to move major equity prices long-term. Look for sudden, significant volume spikes that reflect institutional accumulation. This tells you where major funds are quietly positioning themselves.
- Treat Overbought and Oversold Readings as Alerts: An RSI reading over 70 does not mean you should immediately execute a short trade. It simply serves as an early structural alert that the current upward move is entering a mature, high-risk stage.
- Keep Your Screen Layout Clean: If your technical screen looks like a complex flight command console, it will inevitably lead to analysis paralysis. Strip away redundant lines. A clean chart allows you to see structural support and resistance levels with optimal clarity.
- Always Pair Indicators with Risk Allocation: A highly attractive technical chart setup does not justify risking a massive percentage of your account equity on a single trade. Keep your risk per position strictly limited to a small, sustainable percentage of your total trading capital.
- Incorporate Systematic Stop-Loss Orders: Treat your technical invalidation points as absolute, automated exit rules. Once your risk parameters are set, let your charting platform manage the exit automatically rather than trying to make an emotional choice mid-trade.
- Separate Analytical Process from Financial Results: A trade that hits its stop-loss can still be a structurally excellent execution if it strictly followed a verified, disciplined indicator strategy. Focus entirely on refining your process, and let the long-term mathematical averages handle the account performance.
Case Studies: How Chart Analysis Alters Strategic Choices
Case Study 1: The Fast-Moving Tech Stock Breakdown
- Profile: A retail participant tracking a high-momentum renewable energy company.
- Situation: The stock had advanced 45% over two weeks, driven by intense online discussion and speculative media coverage.
- The Problem: The stock pulled back 5% on a Monday morning. The trader wanted to buy the dip, assuming the explosive upward run would resume immediately.
- The Indicators’ Warning: Before executing, the trader checked the daily chart template. While the short-term price decline looked shallow, the daily RSI stood at 78, and the MACD line was forming a clear bearish crossover far above the zero line. This combo signaled severe momentum exhaustion.
- The Outcome: Rather than chasing the entry, the trader chose to sit on the sidelines. Over the next ten days, the stock declined another 22%, dropping back down to its 50-day EMA line. By waiting for the indicators to reset from their overextended state, the trader saved significant capital.
Case Study 2: The Sideways Consolidation Breakout
- Profile: A swing trader analyzing a mature consumer goods corporation.
- Situation: The asset had been trading inside a flat, narrow channel between $98 and $102 for over two months, resulting in a very boring chart pattern.
- The Problem: The price pushed up to $102.50 on a Thursday afternoon. The trader wondered if this was a genuine breakout or a temporary false spike.
- The Indicators’ Warning: The trader checked the volume bars and Bollinger Bands. The bands had squeezed to historically narrow levels, signaling an impending volatility expansion. Crucially, the volume on the breakout candlestick printed 150% higher than the previous two-week average, showing strong institutional backing.
- The Outcome: The trader entered a disciplined position at $103, setting a strict trailing stop-loss order just beneath the broken $102 structural resistance line. The asset sustained a strong upward trend over the following month, reaching $114. The indicators provided the objective confirmation needed to buy a boring chart setup with confidence.
Case Study 3: The Falling Knife Valuation Trap
- Profile: A beginner investor looking at a well-known media company.
- Situation: The stock had been declining for six months due to shifting consumer trends, dropping from a historical peak of $80 down to $35.
- The Problem: The trader believed the stock was too cheap to drop any further and wanted to commit their entire account balance to a major position.
- The Indicators’ Warning: A detailed chart review revealed that the price was trading well below its declining 200-day SMA line. While the short-term RSI was hovering near 28 (oversold), the macro trend indicator showed a dominant downward path with zero signs of structural base-building.
- The Outcome: The trader decided to hold off, requiring the asset to form a clear higher low pattern and cross above its 50-day EMA before deploying capital. The stock ultimately continued down to $22 over the next two quarters before stabilizing. Waiting for trend confirmation protected the trader from an expensive psychological value trap.
Risk Awareness: What Readers Must Check First
Trading stocks carries inherent financial risks, and relying on technical analysis does not alter that reality. You must understand the limits of these tools to navigate the markets safely.
- The Reality of Lagging Data: Technical indicators calculate past price data. They summarize what capital has done, not what it will do. A sudden piece of corporate news, a regulatory shift, or a major global event can instantly break any chart setup, leaving you exposed if you lack an ironclad exit strategy.
- The Danger of Systemic Execution Risk: During periods of extreme market panic or high volatility, stock liquidity can dry up rapidly. This can cause “slippage,” where your stop-loss order fills at a significantly worse price than you planned. Never risk more capital than you can comfortably afford to lose, and never treat chart setups as a guarantee of safety.
- The Psychological Trap of Revenge Trading: When a technical setup fails and hits your stop-loss, the natural human urge is to jump right back into the market to win the money back. This emotional cycle often leads to abandoning your rules and blowing up your account. Treat every loss as an objective cost of doing business, protect your capital, and consult a qualified professional for personalized financial guidance.
Checklist Before Taking Action
Before you place any directional trade based on chart indicator signals, ensure you can check off every single point on this operational safety list:
- Trend Alignment Check: Have you verified the primary trend direction on the higher-level daily and weekly charts?
- Non-Redundant Tool Confirmation: Did your signals come from distinct indicator classes (e.g., one trend tool + one volume bar) rather than overlapping momentum tools?
- Institutional Volume Verification: Is the volume bar supporting the entry showing active institutional participation rather than retail exhaustion?
- Predefined Invalidation Level: Have you identified the exact technical price point where your trade logic is proven wrong?
- Automated Stop Order Configured: Is your structural stop-loss order entered into your trading platform before exposure begins?
- Risk Allocation Verification: Have you limited the financial exposure of this position to a small, sustainable percentage of your total account capital?
- Macroeconomic Calendar Check: Have you confirmed that no major systemic economic reports or corporate earnings releases are scheduled for today?
- Separation of Essential Capital: Are you certain that the money used for this trade is separate from your personal emergency savings or daily living funds?
Strategic Insights for Better Decision-Making
To elevate your technical analysis from simple chart-reading to long-term strategic execution, you must focus on the concept of Position Sizing.
New traders often spend all their energy searching for the perfect indicator crossover, mistakenly believing that a high win rate is the key to profitability. Professional risk managers understand that how much capital you lose when you are wrong versus how much you make when you are right is what truly determines your long-term success.
Total Capital Exposure = (Entry Price - Stop-Loss Price) x Position Size
Use your technical indicators to find your objective stop-loss exit level before you calculate your position size. For example, if you buy a stock at $100 and your indicator shows structural support at $95, your technical risk per share is exactly $5. If your risk management rules state you can only lose a maximum of $100 on any single trade, you simply divide that total risk cap ($100) by your per-share risk ($5). This tells you that your maximum safe position size for this specific setup is exactly 20 shares.
By scaling your share size based on indicator support boundaries rather than emotional greed, you ensure that no single losing trade can inflict severe damage on your portfolio. This disciplined approach keeps your capital protected across all market environments.
Key Terms Explained for Beginners
- Technical Indicator: A mathematical calculation based on an asset’s historical price, volume, or open interest, displayed visually on a chart to filter out market noise.
- Lagging Indicator: A tool that uses past price data to confirm an active trend or market reversal after the price has already begun to move.
- Leading Indicator: An oscillator that measures the internal speed and velocity of a price change to help identify potential turning points before they happen.
- Overbought: A technical state where an asset’s price has moved upward so fast that its momentum oscillator reaches historical upper boundaries, warning that a pullback may be due.
- Oversold: A condition where an asset’s price has declined rapidly, pushing its momentum oscillator down to lower extremes and signaling that a temporary bounce could be setting up.
- Whipsaw: A challenging market condition where an indicator generates a quick buy or sell signal, only for the price to reverse instantly and trigger an expensive false alarm.
- Divergence: A powerful technical setup where the raw price of an asset moves in the opposite direction of its underlying momentum oscillator, revealing a hidden shift in market strength.
- Support Floor: A technical price zone on a chart where buying interest historically steps in to halt a downward move, acting as a flexible price floor.
- Resistance Ceiling: An overhead price level where selling pressure historically outpaces buying interest, acting as a temporary visual ceiling for upward moves.
- Stop-Loss Order: An automated instruction placed with your broker to close out an open position at a specific price boundary to protect your capital from severe losses.
Who Should Read This Blog
This guide is written specifically for:
- Absolute Beginners: New market participants who feel completely overwhelmed by the visual noise of raw trading charts and need a clean, step-by-step analytical framework.
- Salaried Employees: Individuals who want to manage their personal portfolios actively outside of working hours and need reliable technical value zones to time their equity investments.
- Developing Swing Traders: Traders looking to transition away from random social media tips toward an objective, rules-based system anchored in mathematical probabilities.
- Long-Term Investors: Investors who want to pair fundamental company research with clear chart entry triggers to optimize their long-term capital entries.
Frequently Asked Questions
What is a technical indicator?
A technical indicator is a mathematical calculation derived from historical stock price, volume, or open contract interest. It is plotted directly onto an equity chart to help traders spot active trends, measure momentum speed, and identify risk zones cleanly.
Why are top indicators important for stock traders to understand?
Learning the top indicators every stock trader should know is essential because these tools provide an objective, repeatable framework for analyzing charts. They help remove emotional bias, protect capital, and prevent you from chasing erratic market spikes.
Which technical indicator is most accurate for beginner traders?
No indicator is perfectly accurate or capable of predicting the future. However, Moving Averages (like the 50-day and 200-day simple lines) are ideal for beginners because they are highly reliable for identifying the overall direction of a market trend.
What is the main difference between leading and lagging indicators?
Lagging indicators (like Moving Averages) follow price action to confirm a trend that has already started. Leading indicators (like the RSI oscillator) measure the internal velocity of price changes to flag potential turning points early.
Can beginners rely entirely on indicators to make profitable trades?
No. Relying completely on indicators without an ironclad focus on position sizing and stop-loss execution is a dangerous path. Technical tools are simply decision-support filters; they must always be paired with strict risk management.
How many indicators should I place on my trading chart simultaneously?
You should keep your screen clean and limited to a maximum of two or three non-redundant tools. A classic template includes one overlay trend indicator (like an EMA), one momentum oscillator (like RSI), and daily volume bars.
What does it mean when an indicator says a stock is overbought?
An overbought reading (such as an RSI over 70) means the stock’s price has climbed very fast relative to its historical math. It acts as a clear safety warning that the current upward move is overextended and prone to a near-term pullback.
How do volume bars help confirm indicator signals?
Volume represents institutional commitment. If an indicator signals a trend breakout, but the underlying volume bars are flat and below average, it reveals a lack of heavy fund backing and warns that the move is likely a false trap.
Is it better to change default indicator settings on my chart platform?
No. Beginners should strictly keep the standard factory lookback parameters active. Modifying settings frequently when starting out makes your analysis inconsistent and difficult to track reliably over time.
Can these indicators protect my account from losing money?
Indicators cannot eliminate market risk or prevent individual losing trades. They protect your account balance by providing objective price marks where your trade logic is proven wrong, allowing you to cut small losses before they turn severe.
Which timeframe should a beginner trader use to analyze indicators?
Beginners should focus on higher timeframes like the Daily or 4-Hour charts. Shorter-term frames (like 1-minute or 5-minute charts) contain excessive random price noise that can lead to constant false signals and overtrading.
What is the single biggest mistake to avoid when using indicators?
The biggest mistake is treating an indicator like a guaranteed prediction machine. Always treat technical signals as floating mathematical probabilities, and always enter an automated stop-loss order to protect your capital if a setup fails.
Conclusion and Next Steps
Mastering the top indicators every stock trader should know is a journey that requires patience, discipline, and consistent practice. These mathematical chart tools serve a vital protective purpose by transforming chaotic raw price action into clear, actionable visual zones. They help take the emotional guesswork out of your daily trading routine, allowing you to make decisions based on objective data rather than sudden fear or greed.
However, it is crucial to remember that technical indicators are not magic crystal balls. They do not predict future events, nor can they eliminate the financial dangers of active trading. True trading consistency comes from pairing clean chart analysis with strict capital protection rules, automated stop-loss execution, and structured position sizing. Never let an attractive chart layout convince you to risk an unsafe percentage of your capital on a single position.
As a next step, open a paper trading account or a clean charting interface and plot a standard 50-day Exponential Moving Average alongside a 14-period Relative Strength Index. Spend time observing how these lines behave across high-quality blue-chip assets without placing any real capital at risk. Study how they react during market pullbacks, and build your confidence slowly. By treating technical analysis as a structured, lifelong educational skill, you protect your savings and build a resilient framework for navigating the financial markets responsibly.